123 Sub Category Map
Chris McKeown / July 1, 2025
Power
Overview
The 123 Sub Category Map tool allows you to export and import category and subcategory settings (Object Styles) to and from Excel. This powerful tool expedites project standardization by enabling you to:
- Document all category and subcategory settings in Excel
- Transfer object style standards between projects
- Bulk update line weights, colors, patterns, and materials
- Create new subcategories across multiple projects
- Delete unwanted subcategories in bulk
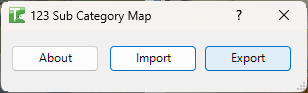
Table of Contents
- Key Features
- Interface Guide
- Example Workflows
- Exported Excel File Structure
- Step-by-Step Guide
- Smart Import Logic
- Output Dialog Logging
- Tips and Best Practices
- Common Use Cases
- Troubleshooting
Key Features
- Export all category and subcategory properties to Excel
- Import settings from Excel with automatic validation
- Create new subcategories from Excel data
- Update existing category and subcategory properties
- Delete subcategories in bulk
- Data validation for line patterns and materials
- Detailed progress tracking and error reporting
- Comprehensive logging of all changes
Interface Guide
The interface is simple and straightforward with three main buttons:
About
- Displays information about Bonus Tools
Export
- Exports all current category and subcategory settings to an Excel file
- Creates a formatted Excel file with data validation
Import
- Imports category and subcategory settings from an Excel file
- Processes New, Delete, and Update operations
- Provides detailed feedback on successes and failures
Example Workflows
Example 1: Adding Company Standard Subcategories
Scenario: Add three new subcategories to Walls category
- Export current project settings
- Open Excel file
- Find the "Walls" category row
- Insert three new rows below it:
| Category | Type | Col 1 | Col 2 | R | G | B | Style | Material | Model | Status |
|---|---|---|---|---|---|---|---|---|---|---|
| Walls | Existing | ... | Update | |||||||
| Walls | New-Build | 2 | 2 | 0 | 0 | 0 | Solid | Concrete | Model | New |
| Walls | Demolition | 3 | 3 | 255 | 0 | 0 | Hidden | <None> | Model | New |
| Walls | Future | 1 | 1 | 128 | 128 | 128 | Dash | <None> | Model | New |
- Save Excel file
- Import into project
- Verify three new subcategories were created
Example 2: Standardizing Line Weights
Scenario: Update all categories to use consistent line weight standards
- Export to Excel
- Search for all rows where Line Weight Projection != desired value
- Update values to company standard
- Set all to "Update" operation
- Import back into project
- Check results summary for any failures
Example 3: Cleaning Up Project
Scenario: Remove unused subcategories from a project
- Export to Excel
- In Revit, identify which subcategories are unused
- In Excel, find those subcategory rows
- Change operation to "Delete"
- Import
- Review that elements formerly using deleted subcategories now use parent category
Exported Excel File Structure
When you export, an Excel file is created with the following columns:
Column Headers
-
Category Name
- The main Revit category (e.g., Doors, Walls, Pipes)
- Cannot be updated - for reference only
- Must use valid Autodesk Revit category names when adding new rows
-
Subcategory Name
- The subcategory name (e.g., Frame, Panel, Hidden)
- Cannot be updated - existing subcategories cannot be renamed
- Shows "null" for main category rows (categories without subcategories)
-
Line Weight Projection
- Line weight for projection view (1-16)
- Values:
1-16: Standard Revit line weights-1: No line weight entered0: Not applicable100: Default value where not set
-
Line Weight Cut
- Line weight for cut view (1-16)
- Values:
1-16: Standard Revit line weights-1: No line weight entered100: Object style does not contain a cut weight (e.g., annotation objects)
-
Line Colour R
- Red component of line color (0-255)
-
Line Colour G
- Green component of line color (0-255)
-
Line Colour B
- Blue component of line color (0-255)
-
Line Pattern
- Name of the line pattern (e.g., Solid, Dash, Hidden)
- Includes data validation dropdown with all available patterns
- If pattern doesn't exist, a default pattern will be created
-
Material
- Name of the material assigned to the category/subcategory
- Includes data validation dropdown with all available materials
- If material doesn't exist, a default material will be created
-
Category Type
- The category type (Model, Annotation, Other)
- Cannot be altered - for information only
-
New/Delete/Update
- Critical column - controls what action is taken during import
- Must contain exactly one of these values:
New: Creates a new subcategoryDelete: Deletes the subcategoryUpdate: Updates the subcategory properties
- Important: Rows without a valid value are skipped during import
Data Validation
The Excel file includes built-in data validation:
- Line Pattern column has dropdown with all project line patterns
- Material column has dropdown with all project materials
- Named ranges are created for easy reference
Step-by-Step Guide
Exporting Category Settings
- Open your Revit project
- Launch 123 Sub Category Map from the Bonus Tools tab
- Click Export
- Choose a location and filename for the Excel file
- Wait for the export to complete (time depends on project size)
- Excel file opens automatically when complete
Progress Tracking:
- A progress bar displays during export
- Shows current status and total number of categories
- Can be cancelled if needed
Modifying the Excel File
Once exported, you can modify the Excel file to prepare for import:
Adding New Subcategories
- Insert a new row below the parent category
- Enter the Category Name (must match an existing category exactly)
- Enter the Subcategory Name (new unique name)
- Set line weights, colors, pattern, and material
- Enter
Newin the New/Delete/Update column
Example:
| Category Name | Subcategory Name | ... | Action |
|---|---|---|---|
| Doors | Custom Frame | ... | New |
Deleting Subcategories
- Find the row with the subcategory to delete
- Change the New/Delete/Update column to
Delete - All other values in the row will be ignored
Warning: When a subcategory is deleted, all elements using that subcategory will revert to the parent category. This affects their display properties.
Example:
- If you delete "Swing" subcategory from "Doors"
- All door elements using "Swing" will now use "Doors" category
- Their line weights, colors, and patterns will change to match the parent category
Updating Existing Subcategories
- Find the row with the subcategory to update
- Modify any of these properties:
- Line Weight Projection
- Line Weight Cut
- Line Colour R, G, B
- Line Pattern
- Material
- Change the New/Delete/Update column to
Update
Note: Category Name and Subcategory Name cannot be changed - these identify which object style to update.
Importing Category Settings
- Launch 123 Sub Category Map in your target project
- Click Import
- Browse to and select your modified Excel file
- Wait for processing to complete
- Review the results dialog
Progress Tracking:
- First pass: Reads Excel file and displays row count
- Second pass: Processes each operation (New/Delete/Update)
- Detailed logging to Revit Output Dialog
Results Summary:
After import completes, you'll see a summary showing:
Passed:
- Category: Count of successfully updated categories
- Category Material: Count of successfully updated category materials
- Category Line Pattern: Count of successfully updated category line patterns
- Sub-Category: Count of successfully updated subcategories
- Sub-Category Material: Count of successfully updated subcategory materials
- Sub-Category Line Pattern: Count of successfully updated subcategory line patterns
- Category Created: Count of successfully created subcategories
- Sub-Category Deleted: Count of successfully deleted subcategories
Failed:
- Same metrics as above for any operations that failed
Smart Import Logic
The tool includes intelligent processing:
-
If
Newis specified but subcategory exists:- Automatically switches to
Updateoperation - Logs a message: "Sub-Category already exists. Updating instead."
- Automatically switches to
-
If
Updateis specified but subcategory not found:- Automatically switches to
Newoperation - Logs a message: "Sub-Category not found. Adding instead."
- Automatically switches to
-
Missing Line Patterns or Materials:
- If specified pattern doesn't exist, a default pattern is created
- If specified material doesn't exist, a default material is created
- You can modify these defaults later in Revit
Output Dialog Logging
All operations are logged to the Revit Output Dialog with color coding:
Gray: Informational messages
- "Attempting to Create within Category: Doors, Sub-Category: Custom Frame"
- "Attempting to Modify sub-Category: Hidden"
Green: Successful operations
- "Custom Frame - created."
- "Hidden - Line Weights updated."
- "Frame - Material updated."
Red: Errors and warnings
- "Sub-Category already exists. Updating instead."
- "Failed to create: Custom Frame [error details]"
- "Line Pattern failed."
Tips and Best Practices
-
Always Export First
- Export from the target project before importing
- Provides baseline understanding of current state
- Helps identify what needs to change
-
Test on a Copy
- Test imports on a copy of your project first
- Verify results before applying to production files
-
Keep Row 1 Intact
- Never modify or delete the header row
- The import process relies on these column names
-
Valid Category Names
- When adding new rows, use exact Revit category names
- Case and spelling must match exactly
- Reference exported file for correct names
-
One Operation Per Row
- Each row should have exactly one operation (New, Delete, or Update)
- Blank operation column means row is skipped
-
Check Output Dialog
- Always review the Revit Output Dialog after import
- Identifies which operations succeeded or failed
- Provides specific error messages
-
Understand Delete Impact
- Deleting a subcategory affects all elements using it
- Elements revert to parent category display
- May cause unexpected visual changes in project
-
Material and Pattern Defaults
- If you specify non-existent materials/patterns, defaults are created
- You'll need to configure these defaults afterward
- Alternatively, create materials/patterns first, then import
-
Save Excel File Properly
- If you get errors, try closing and reopening Excel file
- Save as .xlsx format
- Avoid special characters in file path
-
Process Time - Large projects take longer to process - Be patient during export and import - Progress bar shows current status
Common Use Cases
Standardizing Multiple Projects
- Export from your template or standard project
- Import into each project that needs standardization
- Review and address any failures
- Save projects with updated standards
Transferring Standards Between Offices
- Office A exports their standards to Excel
- Share Excel file with Office B
- Office B reviews and modifies as needed
- Office B imports into their template
- Use updated template for new projects
Bulk Creating Subcategories
- Export current categories to Excel
- Add multiple rows with
Newoperation - Fill in all required properties
- Import to create all subcategories at once
- Much faster than creating one-by-one in Revit
Cleaning Up Unused Subcategories
- Export to Excel to see all subcategories
- Identify unwanted subcategories
- Set their operation to
Delete - Import to remove them all at once
- Check projects to ensure elements display correctly
Color Standardization
- Export to Excel
- Update RGB values to match corporate colors
- Set operation to
Update - Import to apply consistent colors
- Repeat across all projects
Troubleshooting
Import Fails to Start
Problem: Excel file won't open or import doesn't begin Solutions:
- Verify Excel file exists at specified location
- Close Excel file if it's currently open
- Check file isn't corrupted
- Try re-saving Excel file
Rows Being Skipped
Problem: Some rows aren't processed during import Solutions:
- Check New/Delete/Update column contains valid value
- Ensure column contains exactly "New", "Delete", or "Update"
- Check for extra spaces or typos
- Verify category name is valid and exists
Subcategories Not Created
Problem: New subcategories fail to create Solutions:
- Verify parent category exists and is spelled correctly
- Check subcategory name doesn't already exist
- Review Output Dialog for specific error messages
- Ensure subcategory name is valid (no special characters)
Colors Not Updating
Problem: RGB values don't change after import Solutions:
- Verify RGB values are numbers between 0-255
- Check operation is set to "Update"
- Some categories have locked properties
- Review Output Dialog for failures
Line Patterns Not Applying
Problem: Line patterns don't update or create Solutions:
- Check pattern name is spelled correctly
- If pattern doesn't exist, it should auto-create (check this worked)
- Some categories don't support custom line patterns
- Review logging in Output Dialog
Materials Not Assigning
Problem: Materials don't apply to categories Solutions:
- Verify material name is correct
- If material doesn't exist, it should auto-create
- Some categories don't support materials
- Check Material column isn't blank when you intended to assign one
Excel File Errors
Problem: "Error opening the excel file, please reopen and save the excel file and try again" Solutions:
- Close Excel file and save
- Reopen Excel, save as new file
- Check file isn't corrupted
- Verify file is .xlsx format
- Check file path doesn't contain special characters
Need Help? Contact support or refer to additional Bonus Tools documentation.
Thank you for using Bonus Tools - Sub Category Map!